Other information
Information that doesn't quite fit into the existing categories.
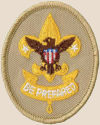
First class badge

The background design is shaped like a trefoil, which was used as the north point on old compasses. This signifies a scout's ability to point the right way in life. The three points of the trefoil correspond to the three raised fingers of the scout sign and represent the three parts of the scout oath - doty to god and country, duty to others, and duty to self.
The eagle with a shield is an emblem of the United States of America. This represents freedom and a scout's readiness to defend that freedom.
The two stars symbolize scouting's ideals of truth and knowledge. The stars also represent stars used for navigation at night, which suggests a scout's outdoor adventures.
The scroll displays the scout motto, be prepared. The ends are turned up liek a smile because a scout smiles as each daily good turn is performed. The knot below the scroll is a reminder to do a good turn.
Pledge of allegiance
I pledge allegiance to the Flag of the United States of America, and to the Republic for which it stands, one Nation under God, indivisible, with liberty and justice for all
Whipping and fusing ropes
Whipping and fusing are used to fix frayed ends of rope.
Whipping: cut away any rope that has already unraveled. Form a loop in a 2 foot long piece of strong cord. Lay the loop along one end of the rope. Tightly wrap the cord around the rope, working your way toward the loop formed in the cord. Tuck the end of the cord through the loop and pull on the free hands. Trim away extra cord.
Fusing: make sure the rope is made of plastic or nylon, not natural materials like sisal. Cut off the frayed part of the rope. Hold the rope a few inches above a source of heat. Wait for the melted rope to heat.
EDGE method
EDGE is used to teach a skill by explaining how it is done, demonstrating the steps, guiding learners as they practice, and enabling them to succeed on their own.
The first step is explaining. The teacher explains the skill, showing all the steps. Go slowly, make actions deliberate, and use descriptive language.
Then, demonstrate the skill. Show the step by step process and explain the details of how each step is done and why. Allow the learner to ask questions.
Guide the learner when making the first few attempts. Let the learner be completely hands on. Don't wory if mistakes are made - just give guidance on fixing it. Be patient.
Lastly, enable the learner by letting them perform the skill independently.
Hiking safety
- Try to stay on the trail
- Watch where you put your hand
- Study your map before hiking
- Detour if you aren't sure you can navigate an obstacle
- Stay with your patrol
- Watch where you place your feet
- Use bridges to cross streams
- Wade through water only if there is no other options, if the water is shallow, and the current is slow
- Release hip belt and sternum strap of backpack before wading through water
Highways and roads:
- Stay isingle file
- Face the traffic
- Make yourself visible by wearing light colored clothing or using reflective ribbon
- Use a flashlight during night
Safe swimming
- Qualified supervision: have an adult leader age 21 or older who is trained in safe swim defense present.
- Health: provide a current and complete health history
- Safe area: the water must be cleaned. Hazards must be eliminated or clearly marked
- Lifeguards: trained and properly equipped rescue personnel must be on duty
- Lookout: a lookout appointed by the supervisor monitors from a position with a clear view.
- Ability: participants are limited to the swimming area and activities that match their personal ability.
- Buddy system: stay close to a buddy. Alert the safety team if a buddy is missing or needs assistance.
- Discipline: know and respect the rules. Follow instructions from adult leaders.
Safe swim area
Before swimming, the area must be safe.
- There must be safe areas for participants to enter and leave the water. The area must be within easy reach of rescue personnel. Stay away from boat traffic, surfing, or other nonswimming activities.
- The bottom must be clear of trees and debris
- Underwater hazards must be removed
- Maximium water depth in clear water is 12 feet and 8 feet for muddy water
- No underwater swimming and diving in turbid water. Turbid water is when swimmmers treading water cannot see their own feet
- Avoid bodies of stagnant, fetid water, areas with algae or foam, or areas polluted by livestock
- Avoid areas with waves, fast currents, or currents that flow toward the open sea or areas of danger
- Move to safety whenever lightning or thunder is present. Wait 30 minutes after the last lightning flash.
- Wear coast guard approved life jackets if depth exceeds limits specified earlier
Views: 173
Replies coming soon